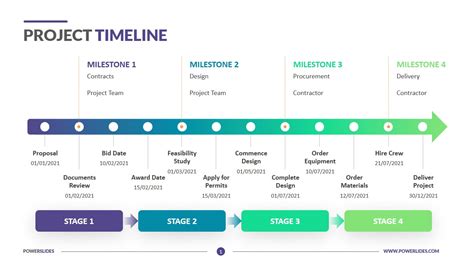
Creating a keynote project timeline is an essential step in planning and executing a successful presentation. A well-crafted timeline helps you stay organized, focused, and ensures that your project is completed on time. In this article, we will guide you through the process of creating a keynote project timeline in 5 easy steps.
Understanding the Importance of a Keynote Project Timeline
Before we dive into the steps, it's essential to understand why a keynote project timeline is crucial for your presentation. A timeline helps you:
- Set clear goals and objectives
- Prioritize tasks and allocate time for each activity
- Identify potential roadblocks and develop contingency plans
- Collaborate with team members and stakeholders
- Stay on track and ensure timely completion of the project
Step 1: Define Your Project Scope and Objectives
The first step in creating a keynote project timeline is to define your project scope and objectives. Take some time to brainstorm and answer the following questions:
- What is the purpose of your presentation?
- Who is your target audience?
- What are the key messages you want to convey?
- What are the expected outcomes of your presentation?
Write down your answers to these questions and create a clear project scope statement. This statement will serve as the foundation for your timeline.

Step 2: Break Down Your Project into Tasks
Once you have a clear project scope statement, break down your project into smaller, manageable tasks. Identify all the activities required to complete your presentation, including:
- Research and content creation
- Design and layout
- Rehearsals and practice sessions
- Technical setup and testing
- Final review and editing
Use a task list or a mind mapping tool to organize your tasks and create a visual representation of your project.

Step 3: Estimate Time Requirements for Each Task
With your task list in hand, estimate the time required for each activity. Be realistic and consider the following factors:
- Your level of expertise and experience
- The complexity of each task
- The availability of resources and support
- The potential for unexpected delays or setbacks
Use a calendar or a scheduling tool to allocate time for each task and create a rough outline of your project timeline.

Step 4: Identify Dependencies and Critical Path
With your estimated time requirements in place, identify the dependencies between tasks and determine the critical path. The critical path is the sequence of tasks that determines the minimum duration required to complete your project.
Use a Gantt chart or a project management tool to visualize your timeline and identify the critical path.

Step 5: Review and Refine Your Timeline
The final step is to review and refine your timeline. Check for:
- Realistic time allocations
- Adequate buffers for unexpected delays
- Sufficient time for rehearsals and practice sessions
- Opportunities for collaboration and feedback
Make any necessary adjustments to your timeline and ensure that it is realistic, achievable, and aligned with your project objectives.

Gallery of Keynote Project Timeline Examples


Frequently Asked Questions
What is a keynote project timeline?
+A keynote project timeline is a schedule of tasks and activities required to complete a presentation project.
Why is a keynote project timeline important?
+A keynote project timeline helps you stay organized, focused, and ensures that your project is completed on time.
How do I create a keynote project timeline?
+Follow the 5 easy steps outlined in this article to create a keynote project timeline.
By following these 5 easy steps, you can create a comprehensive keynote project timeline that helps you deliver a successful presentation. Remember to review and refine your timeline regularly to ensure that you stay on track and achieve your project objectives.
