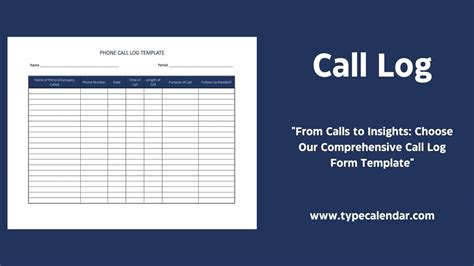
Creating a printable call log template in Excel is a straightforward process that can help you keep track of your phone calls, meetings, and conversations with clients, colleagues, or anyone else. A call log is an essential tool for maintaining records, especially in sales, customer service, or any profession that involves frequent communication. Here's a step-by-step guide on how to create a printable call log template in Excel easily.
Step 1: Set Up Your Excel Spreadsheet
-
Open Excel: Start by opening Excel on your computer. You can use any version of Excel, as the steps are relatively the same across versions.
-
Create a New Workbook: Click on "File" > "New" to create a new workbook. Choose a blank workbook.
-
Give Your Workbook a Name: Save your workbook with a meaningful name, like "Call Log Template."
Step 2: Design Your Call Log Template
-
Create Headers: In the first row of your spreadsheet, create headers for the information you want to log. Common headers include:
- Date
- Time
- Caller/Recipient Name
- Contact Method (Call, Email, Meeting, etc.)
- Purpose of Call
- Details of Conversation
- Follow-up Actions
- Next Contact Date
-
Format Your Headers: Highlight your headers and format them to stand out, such as making the text bold and the background a different color.
Step 3: Add Functionality with Dropdowns
-
Use Dropdowns for Efficiency: To make your template more user-friendly, consider adding dropdowns for fields like "Contact Method" or "Purpose of Call." This will limit user input and keep your data consistent.
-
Create a Dropdown List: To create a dropdown, select the cell where you want the dropdown to appear, go to the "Data" tab, click on "Data Validation," and then select "List" from the dropdown menu. Specify the range of cells that contain your list options.
Step 4: Make It Printable
-
Adjust Column Widths: Ensure that all your columns are wide enough to display the data without truncation. You can adjust column widths by dragging the border of the column header.
-
Set Page Layout: Go to the "Page Layout" tab to adjust margins, orientation, and scaling. You can also specify which rows or columns to repeat on each page if your call log spans multiple pages.
-
Add a Header or Footer: If you want a header or footer to appear on each printed page, go to the "Insert" tab and click on "Header" or "Footer." Here, you can insert page numbers, the date, or any other information you find useful.
Step 5: Add Example Entries and Save
-
Populate with Example Data: To make your template more intuitive for users, consider adding a few example entries. This will help them understand how to use the template.
-
Save Your Template: Once you're satisfied with your template, save it. It's a good idea to save it in a location that's easily accessible, like a shared drive or a cloud storage service.
Step 6: Distribute and Use
-
Share Your Template: If you're creating this template for a team or organization, share it with them. Make sure to provide instructions on how to use it effectively.
-
Keep It Updated: Periodically review and update your call log template as needed. You might find that certain fields are unnecessary or that you need to add new ones.
Creating a printable call log template in Excel is a simple yet effective way to manage your communications. By following these steps, you can have a customizable and functional tool that meets your specific needs.
